How to Choose Garage Shelving Bins and Bulk Removal Containers
How to Choose Garage Shelving Bins and Bulk Removal Containers
A smart garage makeover starts by right-sizing two things: the bins and shelves you’ll keep, and the bulk removal container that clears what you don’t. Yes—there are purpose-built bins for garage shelving and driveway-safe containers for bulk junk removal. This Recycler Routing Guide to garage dumpsters and shelving bins blends organization best practices with logistics-first tips so you can plan a weekend garage organization sprint or a phased reset without surprise fees. Below, you’ll find clear steps to align goals and timelines, compare shelf and bin options, choose the right Bagster or roll-off size, plan a driveway-safe placement, and set labels and refresh cycles that stick.
Confirm your goals and timeline
Decide whether you’re doing a quick declutter, a seasonal swap, or a full reset tied to a dumpster or Bagster pickup. Set a deadline—one weekend versus 30 days—then align your garage cleanout timeline to your dumpster rental scheduling. Work in 2–4 hour blocks that fit delivery/pickup windows, stage rollout bins near the garage door, and pre-label keep/donate/recycle/landfill/HHW piles. If booking a container, ask for flat-rate pricing with an included weight cap and track heavy items as you load to avoid overages. This mirrors Recycler Routing Guide’s standard booking checklist for predictable costs.
Audit items and create garage zones
Inventory tools, seasonal gear, sports equipment, hardware, and waste/recycling, then assign zones based on use frequency and weight—such as workbench, seasonal, sports, and waste. This prevents overbuying bins that don’t fit how you actually use the space, a staple of both Life in Jeneral’s organizing approach and Extra Space Storage’s garage tips.
Garage zoning defined: A planning method that maps your inventory to dedicated areas—like workbench, seasonal storage, sports, and waste—based on how often items are used and how heavy or hazardous they are. Zoning drives container size, shelf placement, and access paths to reduce searching and lifting errors.
Quick worksheet:
- Must-keep
- Donate/sell
- Landfill
- Recycling
- HHW (household hazardous waste)
Select shelving that matches load and access needs
Verify load ratings and materials before you buy. Wall-mounted wire shelving can hold about 100 lb per linear foot when properly installed, and plastic-coated options resist rust while their open-wire design promotes airflow to reduce mold and mildew, according to the Lowe’s Garage Storage Buying Guide. Match shelf type to humidity, reconfigurability, and the bins you’ll use.
Comparison guide:
| Shelf type | Typical load rating | Moisture resistance | Best for | Adjustability | Mobility |
|---|---|---|---|---|---|
| Wall-mounted wire | ~100 lb per linear foot | High (plastic-coated) | Clear/open bins, light tools | Moderate (brackets, standards) | Fixed |
| Wall-mounted solid (MDF/plywood on brackets) | 40–80 lb per linear foot (bracket dependent) | Low–moderate (seal edges) | Lidded totes, boxes | Moderate | Fixed |
| Freestanding wire/resin | 200–600 lb per shelf (model dependent) | High (wire/resin) | Mixed bins, pantry-style storage | High (adjustable shelves) | Optional casters |
| Freestanding steel | 350–800+ lb per shelf (heavy-duty) | High | Heavy totes, equipment | Moderate–high | Optional casters |
| Overhead ceiling racks | 250–600 lb total (model dependent) | High (powder-coated steel) | Seasonal totes, long items | Fixed once installed | Fixed |
| Utility cabinets/workbench | 50–150 lb per shelf | Varies (resin/steel best) | Chemicals, tools, supplies | Modular options | Casters on tool chests |
Source notes: Load and material guidance summarized from the Lowe’s Garage Storage Buying Guide.
Wall-mounted shelving
Choose wall-mounted systems to reclaim floor space and keep frequently used bins at eye level. Wall-mounted wire shelves can hold about 100 lb per linear foot, and plastic-coated shelving resists rust and corrosion in garages. If using MDF/plywood shelves, support them with heavy metal brackets anchored into studs. Place clear or open bins on mid-level shelves for grab-and-go access, and favor open wire to promote airflow and curb mildew in unconditioned spaces (per Lowe’s guidance).
Freestanding shelving
Freestanding units offer flexible layouts and mobility; models come in wood, wire, resin, and even versions with locking caster wheels you can move and then lock in place, as outlined by Lowe’s. For damp garages, pick resin or wire for moisture resistance, a recommendation echoed by Extra Space Storage’s garage tips. Put heavier lidded totes on lower tiers and use caster-equipped units as pull-out staging during cleanout day.
Overhead racks
Overhead ceiling racks maximize vertical space for infrequent, bulky, or seasonal items. Always secure them into ceiling studs or joists and observe weight limits to protect vehicles, a key point in Organized Assistant’s overview of garage products.
Overhead garage rack defined: A ceiling-mounted steel frame that elevates lidded bins and long items above vehicles, reclaiming otherwise unused space. Proper installation requires lag anchors into joists or studs, adherence to manufacturer weight limits, and careful clearance planning around garage door tracks, openers, and lighting.
Reserve this zone for low-frequency items; don’t stash anything here that you routinely stage to the curb.
Cabinets and workbench systems
Use enclosed storage for chemicals and sharp tools and integrate work surfaces for projects. Utility cabinets come in resin, metal, and wood/composites; lockable doors keep kids away from hazards, and steel tool chests often include heavy-duty, lockable casters and integrated locks with drawers for bulky tools and small accessories, per the Lowe’s guide. Pair cabinets with pegboards to keep essentials visible and allow easy expansion over time.
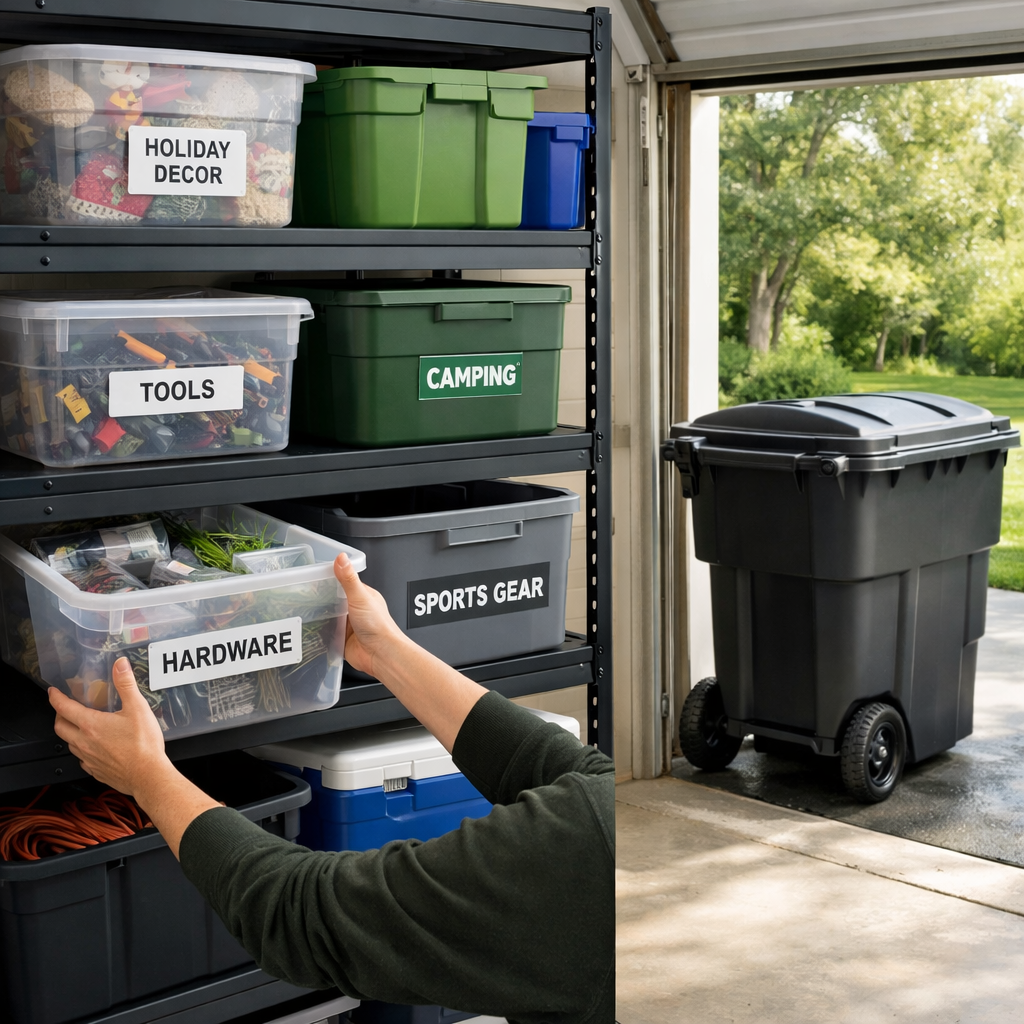
Choose bin types for visibility, durability, and fit
Choose clear bins for instant identification, and open structured bins where inventory changes frequently. Measure shelf depth and height so stackable totes and organizers fit without wasted space. Place labels on bin fronts at eye level and on undersides for high shelves—a pro tip featured in the “10 Tips to Organize ANY Garage” video.
Open bins and clear totes for frequent-use items
See-through, hard bins without lids reduce steps and make daily returns painless; mesh baskets also work well for constant-use categories, techniques championed by Life in Jeneral and Just a Girl and Her Blog. Store these between waist and eye level, and micro-sort with small bins inside larger ones to keep subcategories tidy.
Lidded heavy-duty totes for tools and chemicals
Use lidded bins on shelves for tools and utility items; durable HDX-style black bins with yellow lids are a popular pick for heavier storage, as seen in Life in Jeneral’s guidance and the Organized Assistant roundup. Favor resin or HDPE totes for moisture resistance. Keep chemicals inside lockable cabinets and the heaviest totes on lower shelves.
Small parts organizers for hardware and fasteners
Small parts cabinets, tip-out organizers, and interlocking drawers keep fasteners visible and sortable; stackable plastic bins excel for nuts, bolts, and screws, a setup promoted by the Container Store’s garage organization guide and Organized Assistant. Add drawer organizers and compartment trays, and label generically so systems adapt.
Hooks, tracks, and pegboards for bulky or odd-shaped items
Pegboards offer practical, at-a-glance tool organization, while Gladiator-style track systems corral outdoor tools and wall hooks lift bulky items off the floor—approaches featured in Organized Assistant’s roundup and Just a Girl and Her Blog’s garage ideas. Park long-handled tools in corner racks and keep hand tools on pegboards by the workbench.
Right-size bulk removal containers to your debris profile
Debris profile defined: A short summary of the materials you’ll dispose of—how much, what type (light household junk versus dense debris), and any contamination risks. Your profile determines dumpster size, included weight caps, load order, and whether to separate materials to prevent overages and landfill surcharges. Recycler Routing Guide starts every recommendation with your debris profile to align size, access, and included tonnage.
Quick comparison (at a glance):
- Bag-style pickup: Compact footprint, lift-access only, scheduled pickup; better for light, compactable junk; flat-rate varies by market with smaller included tonnage.
- 10-yard mini roll-off: More cubic yards, swing door for walk-in loading, 2–4 hour delivery windows; better value for bulky items; flat-rate typically includes a higher weight cap.
Bagster vs 10 yard mini dumpster
Choose Bagster for light, compactable junk or a single-bay purge; pick a 10-yard mini roll-off for multiple bulky items, cabinets, or wood since the swinging door eases loading and you’ll make fewer trips. For pricing norms, driveway fit, and capacity tips, see the Recycler Routing Guide mini dumpster vs. Bagster guide.
When a 20 yard makes sense
Upsize to a 20-yard when clearing multi-room contents, bulky furniture/appliances, or project debris from new shelving builds. It commonly balances volume with residential driveway fit. Verify driveway length/width and overhead clearance in advance and secure a 2–4 hour delivery window so your team can stage on time. Recycler Routing Guide often recommends a 20-yard for multi-room cleanouts when access and clearance allow.
Dense materials and weight caps
Weight cap defined: The maximum included tonnage in a flat-rate dumpster price. Materials that push the load over this cap incur per-ton overage fees. Caps vary by size and market, so track dense items—concrete, tile, soil—and keep them separate to protect your budget. Load heavy debris in smaller lifts or plan a dedicated heavy load; keep heavy bins on low shelves before transfer. Recycler Routing Guide treats dense debris as its own stream to control weight and routing.
Plan placement for safety, mobility, and staging
Draw a simple floor plan: leave car clearance, maintain 36-inch aisles, set a work triangle around the bench, and reserve a straight “garage staging lane” from shelves to the door for the fastest path to the curb or container. For driveway-safe dumpster placement, plan surface protection and clear truck access.
Driveway-safe setup and surface protection
Lay plywood or rubber mats under roll-off wheels, confirm the approach angle and door swing, and avoid soft asphalt in summer heat. Position shelves so doors and mirrors won’t strike them, and always anchor overhead racks into studs to protect vehicles below, as noted by Organized Assistant. This aligns with Recycler Routing Guide’s placement standards for safe spotting and retrieval.
Keep aisles clear and bins within reach zones
Place frequent-use open bins between 30–60 inches high and the heaviest totes on the bottom shelf. Keep 36-inch aisles for safe carrying. For high shelves, label bin undersides so you can identify contents before climbing (per the 10 Tips to Organize ANY Garage video).
Rollout bins and wheeled totes for staging to the curb or container
Rollout bins are handy for everyday access and can double as mobile staging to the curb or dumpster, a tactic highlighted in Extra Space Storage’s garage tips. Choose wheeled, stackable totes that fit through the garage door and nest in a pickup or roll-off; lock casters on freestanding shelves during loading, as advised by Lowe’s.
Verify permits, delivery windows, and pricing terms
Lock down the logistics before you book so drop-off and pickup run smoothly—and fee-free.
Glossary:
- Flat-rate pricing: One all-in price that includes delivery, pickup, disposal, rental days, and an included tonnage.
- Rental window: The number of days the container can remain on-site before daily or swap fees apply.
- Weight cap: Included tons before overage fees apply.
- Overage fee: Per-ton charge for loads exceeding the included cap.
- Contamination: Prohibited or mis-sorted materials that trigger surcharges or rejections.
2–4 hour delivery windows and access constraints
Provide gate codes, the best approach route, and a backup contact. Stage cars off the driveway, mark the placement zone with cones, and note overhead obstructions (tree limbs, low lines, door tracks) and minimum truck clearance to prevent failed spotting.
Flat-rate clarity, weight caps, and overage avoidance
Request a written, all-in flat rate with rental days, included tonnage, per-ton overage rates, and any surcharges. Practice overage avoidance: separate dense debris, don’t waterlog loads, and keep contamination out to prevent rejections and add-on fees. Use Recycler Routing Guide’s flat-rate checklist to confirm terms in writing.
Curbside or street placement permits
Many municipalities require a permit for street or curbside placement, including rules on allowable hours and safety cones/reflectors. Verify early and keep permit copies on-site. If curbside isn’t allowed, plan a driveway-safe setup with surface protection and clear access.
Label, maintain, and prevent contamination
Keep the system simple so it sticks. Label bins generically enough to flex with inventory changes, use drawer organizers for small tools, and schedule a quarterly 30–60 minute refresh to purge, relabel, and rebalance shelves—tactics echoed by Life in Jeneral.
Simple labels and refresh cycles
Use 1–3 word generic labels (e.g., “Camping,” “Paint,” “Safety”) and place labels on bin fronts and the undersides of high bins (per the 10 Tips to Organize ANY Garage video and Life in Jeneral). Set quarterly reminders to consolidate micro-bins and rotate seasonal items forward.
Separation of recyclables, HHW, and dense debris
Designate space for trash and recycling bins from the start and stage HHW separately from general junk, a best practice reinforced by Extra Space Storage. Keep tile, concrete, and other dense debris separate to manage weight and route them appropriately.
Avoiding surprise fees at pickup
Keep liquids, electronics, and HHW out of general-junk loads, don’t overfill past the rim, and cover loads before rain to prevent water weight. Photograph the empty container, loaded container, and placement area for your records.
Dispatch checklist and measurements to finalize the order
Use this Recycler Routing Guide dumpster dispatch checklist to avoid day-of hiccups. Capture delivery access measurements, driveway width, and a placement photo, then confirm the 2–4 hour window in writing.
Step-by-step:
- Measure shelves and choose bins; count open vs. lidded and small-parts organizers.
- Inventory debris and pick Bagster, 10-yard, or 20-yard by volume and density.
- Record driveway width/length, slope, surface, and overhead obstructions.
- Mark placement with cones; move vehicles; note gate codes and approach route.
- Get a flat-rate quote with rental days, included tons, and overage terms; book delivery.
Shelf dimensions, bin footprints, and load ratings
Measure shelf width, depth, and clearance; match bin footprints and confirm stack heights. Verify wall-mount load ratings (about 100 lb per linear foot for wire shelves) and moisture-resistant coatings for garages, per Lowe’s. Note counts for lidded totes, open bins, and where small-parts organizers will mount.
Container clearance, driveway width, and overhead obstructions
Record driveway width, length, slope, and surface (concrete/asphalt). Map the truck’s path and turning radius, clear a 10–12 ft wide lane where needed, and identify overhead lines, tree limbs, and garage door rails near the placement zone.
Photo notes for hauler and placement diagram
Take wide shots of the driveway, approach, and preferred spot marked with cones. Include a simple sketch showing door swing and the safest exit path, plus any constraints (gate code, neighbor parking) and your exact 2–4 hour delivery window.
Frequently asked questions
What bin sizes fit common garage shelves?
Most shelves are 18–24 inches deep; medium clear totes (12–20 gal) and standard heavy-duty totes (27 gal) fit well. Recycler Routing Guide recommends measuring width and height and leaving 1–2 inches of clearance.
How much weight can garage shelves and bins safely hold?
Properly installed wall-mounted wire shelves hold about 100 lb per linear foot. At Recycler Routing Guide, we keep heavy-duty totes on lower shelves to keep centers of gravity low.
Which materials are best for damp or unconditioned garages?
Choose plastic-coated wire shelves and resin/HDPE bins for moisture resistance and airflow to curb mold. Recycler Routing Guide favors metal for heavy loads and locking cabinets for chemicals.
Should I choose a Bagster or a 10 yard dumpster for a garage cleanout?
Pick Bagster for light, compactable junk; choose a 10-yard mini roll-off for bulky items or larger cleanouts thanks to added capacity and a walk-in door. Recycler Routing Guide’s sizing guidance starts with your debris profile and access.
Can I place a dumpster on the street without a permit?
Often you need a curbside/street placement permit—verify your city’s rules in advance and keep documentation on-site. Recycler Routing Guide advises confirming permit terms before scheduling delivery.